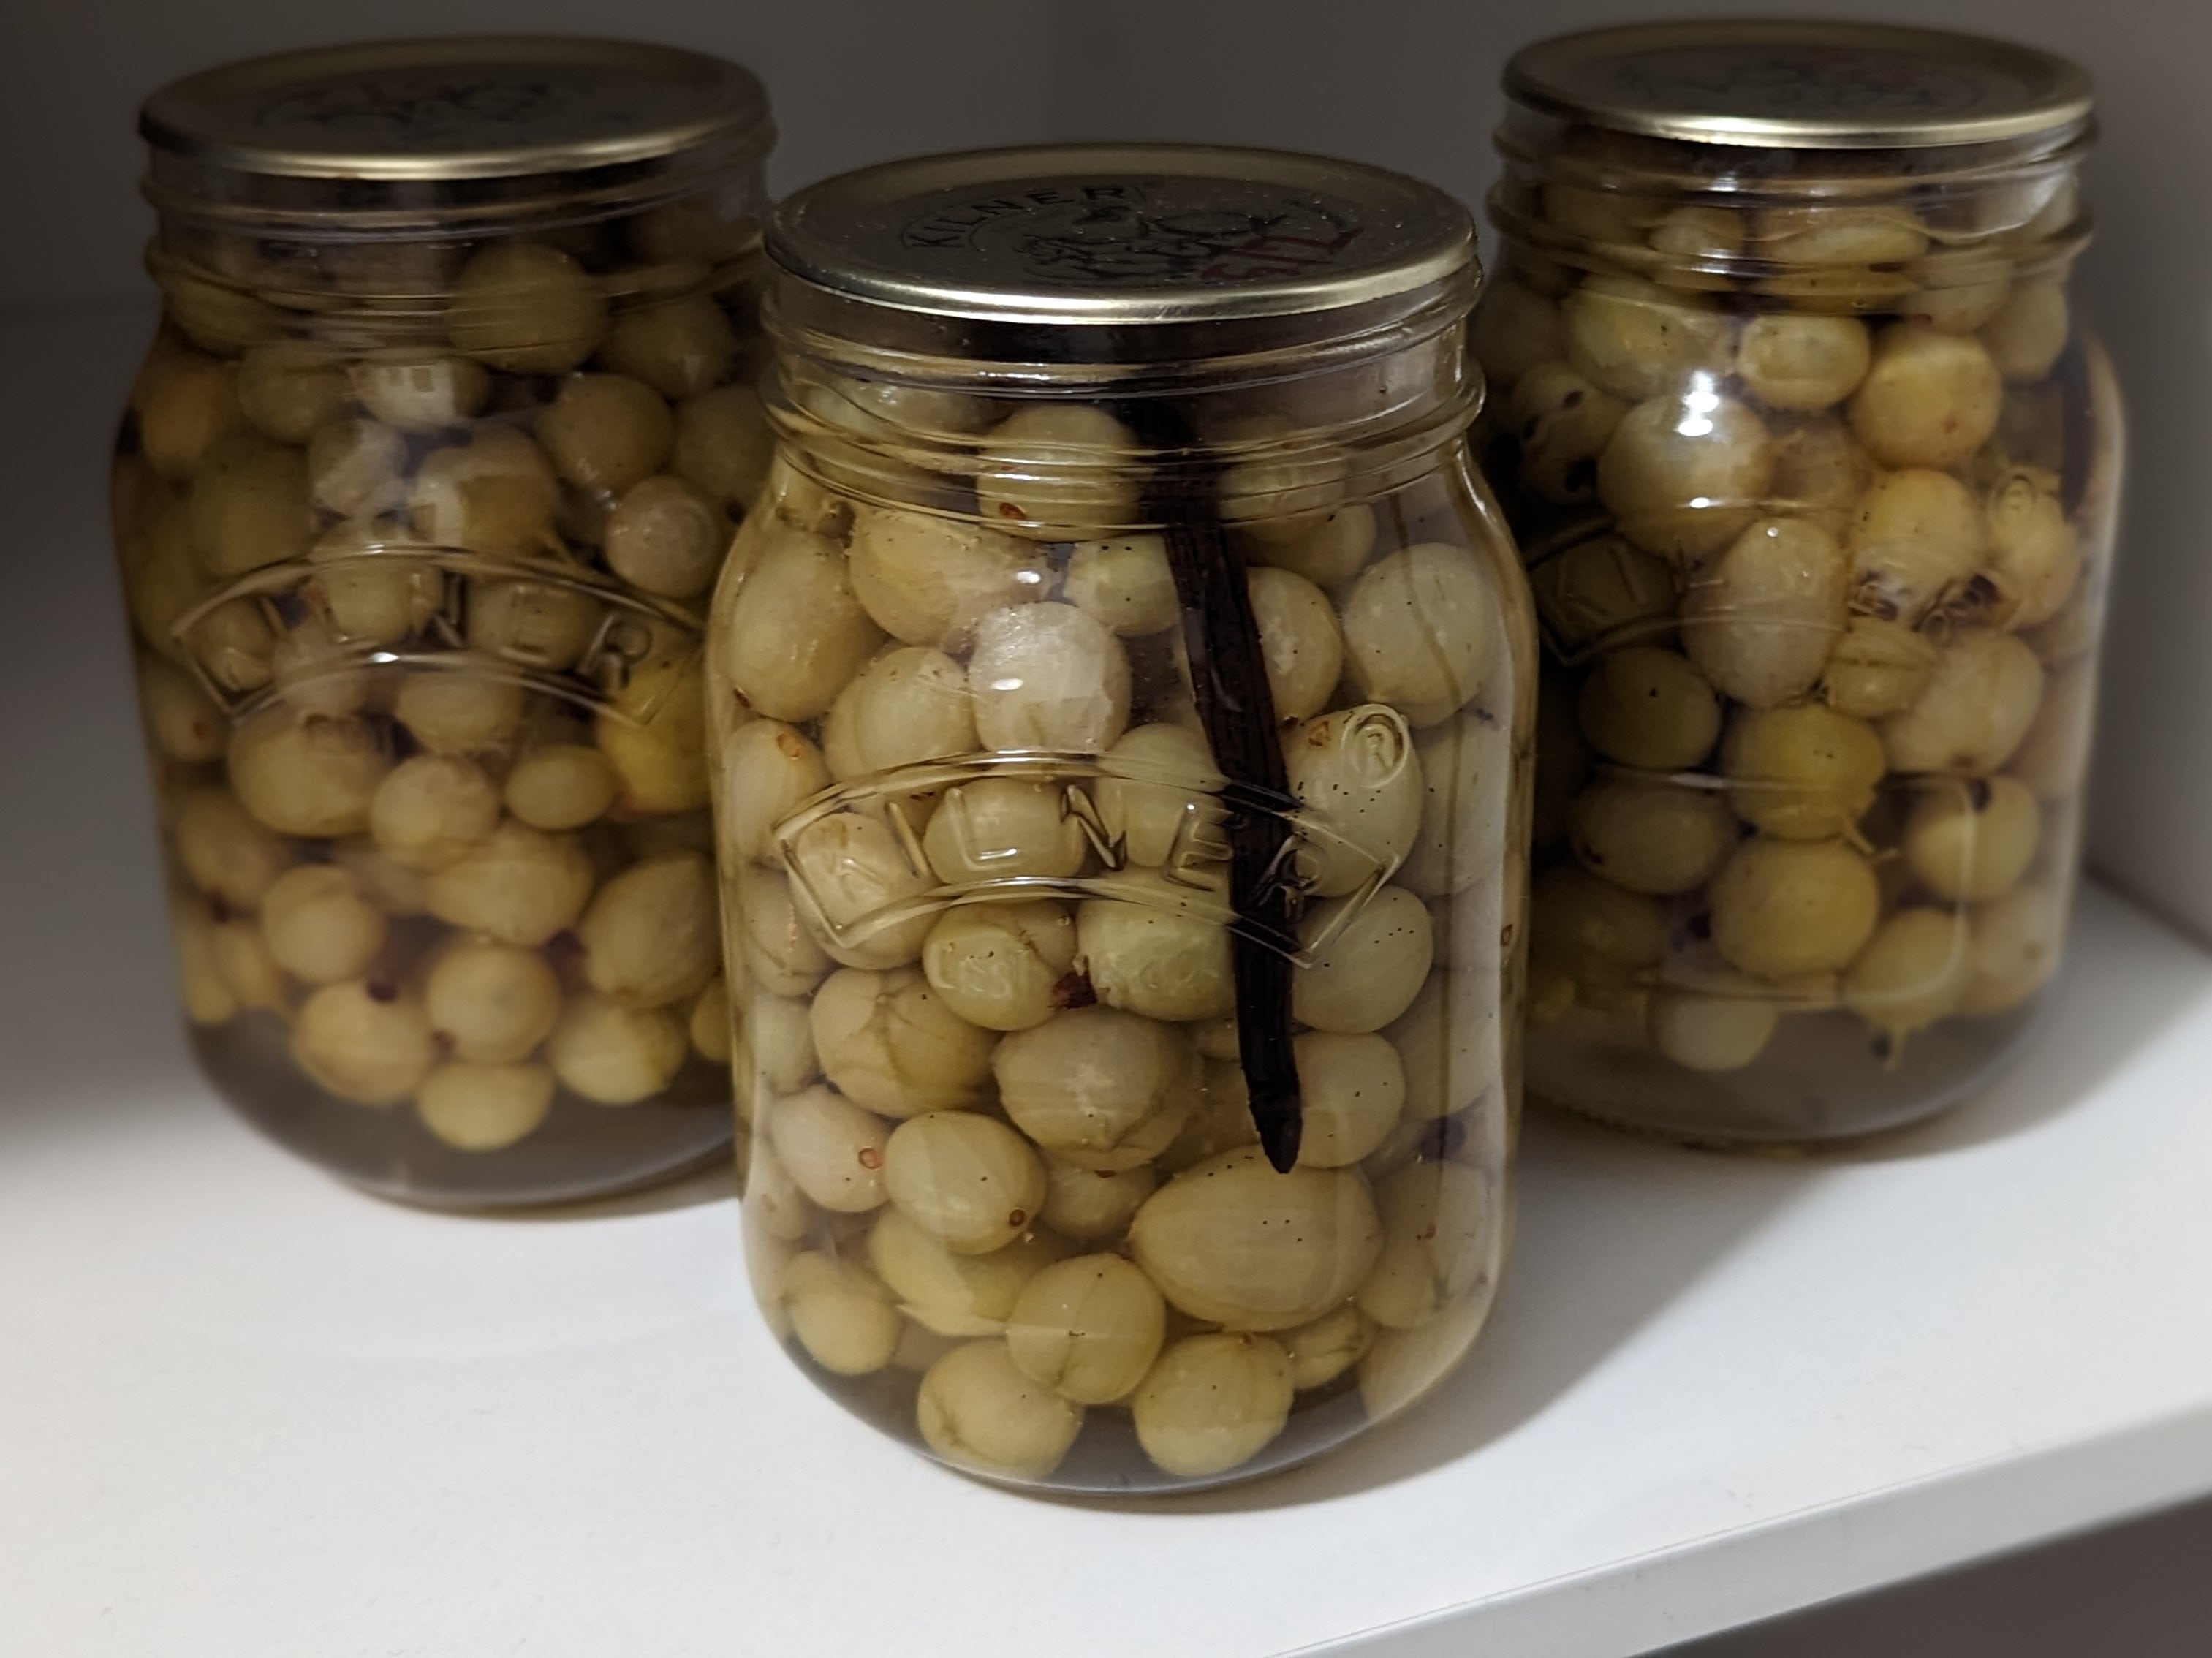
Vanilla-poached Gooseberries
effort: 😫😫 reward: 😋😋😋
source: Personal recipe (see below)
comments:
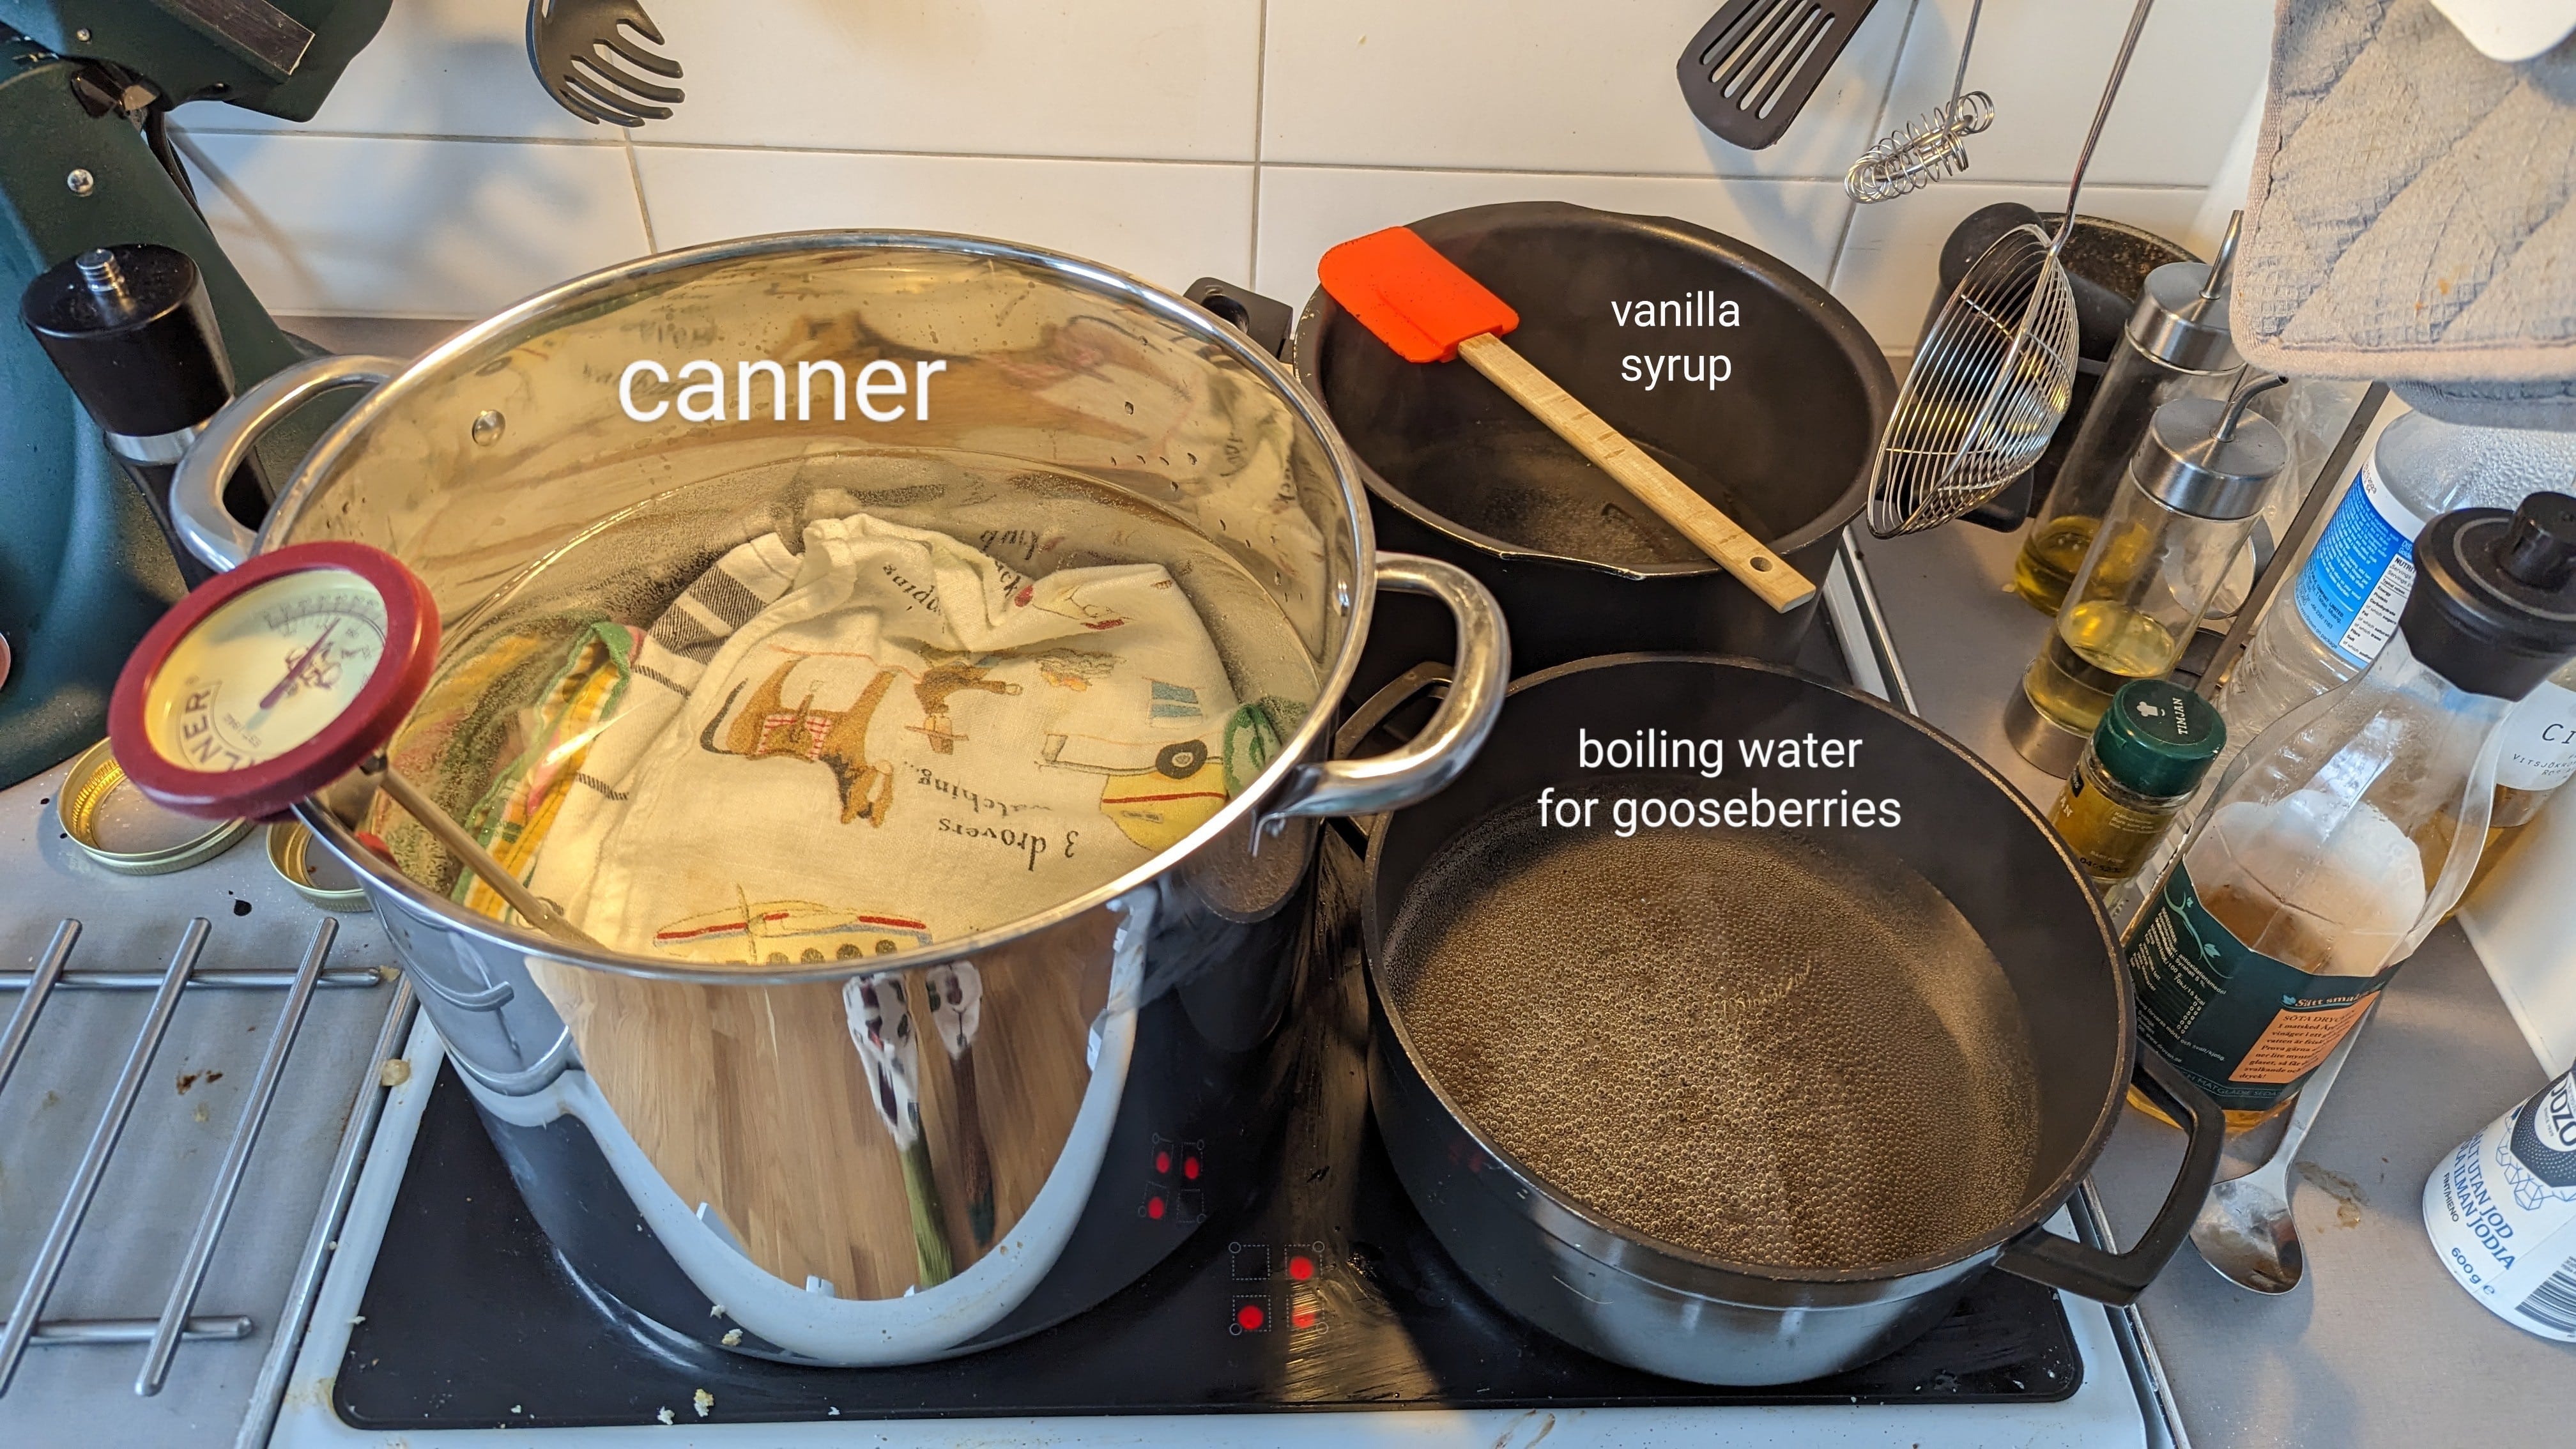
Even though it seems like a lot of work, and it is an initial investment buying the jars and equipment, I think in the long run canning poached fruit is really worth it to save time when making desserts. The more often you do it the easier it becomes too. Aside from the canning jars themselves, you will need a big, tall pot (I got a 15 litre one from IKEA), a jar lifter, and a thermometer. A funnel is also useful for getting the gooseberries into the jars. Kilner sells all of this equipment along with their jars.
With this recipe, you get three batches of poached rhubarb for the price of one (that also makes it more worthwhile using a real vanilla bean for it as they're pretty expensive to use for just a single dessert).
Since they're seasonal, I often do a double batch of these in summer so that I can have gooseberry desserts the rest of the year. Something about how the gooseberries maintain their taste and texture. You can use these to very quickly whip up a crumble or a fool.
Recipe
Ingredients
- 1 kg gooseberries, topped and tailed
- 220g sugar
- 550ml water
- 1 vanilla pod, split
Method
- Preheat the oven to 150 degrees (for warming the jars). You will need three 500ml jars.
- Place a trivet or some folded teatowels on the bottom of your giant processing pot (to protect the bottoms of the jars), then fill the pot with lots of water (enough so that the jars when you add them will be covered) and warm it until it's just barely simmering at 180f/80-85 c degrees. Also, boil a kettle of water so that you have extra water if needed to top up the amount in the pot.
- Put the sugar, water, and vanilla pod with seeds scraped out in a pan and heat gently until the sugar has dissolved. Then, increase the heat and boil for one minute.
- Meanwhile, wash your jars with hot soapy water then place the clean jars in the oven for five minutes. At the same time, bring a third medium sized pot of water to boil (this is for getting the gooseberries hot before you can them).
- Remove the jars from the oven. Use a sieve to dunk the gooseberries into the boiling water for 30 seconds (so you can put them in and then lift them out again easily). Then, use a slotted spoon to transfer the hot gooseberries into the waiting warm jars. Leave about one cm (1/2 inch) of headspace at the top of the jars (so don't fill them to the brim).
- Fill the jars with the hot syrup, so it just covers the gooseberries, maintaining that cm of headspace. Then use a chopstick or similar to get rid of any bubbles (push at the bubbles and they will float to the top of the jar).
- Firmly seal the lids of each jar, but don't make them super tight because the air still has to escape a bit afterwards when they cool down (that's how you get a seal). Then, using your tongs gently lower them into the simmering water one by one.
- Top up with boiling water from the kettle as necessary so that there is about an inch of water covering the top of the jars. Then turn up the heat and bring the water to a rolling boil (100 degrees c), and keep the jars in the water while its boiling like that for 15 minutes if below 1,000 feet in elevation. See here for a guide if you're at a higher elevation than that. You can top up with extra boiling water as needed during this time.
- When the 15 minutes is up, remove the pot from the heat and then let the jars sit in the hot water for another 5 minutes.
- Carefully lift the jars out of the boiling water, being careful not to tilt them too much.
- Place the jars on oven gloves or something heatproof and then let them cool completely without touching them, leaving ample space between the jars.
- Once the jars have cooled completely, remove the ring bands if you're using Kilner jars, and then check if you've got a good seal by seeing if you can lift the jar up just by the lid without it opening. If you can, you're good, and you can store that jar in the pantry for months if you like until you want to use it. If you didn't get a good seal, place that jar in the fridge and use it within a week or so. Check the manufacturer's instructions for other types of jars.